
Technique
Front lever progression: build a level hold step by step
Move from tuck to full front lever by filming the same body-line checkpoints and changing one variable at a time.
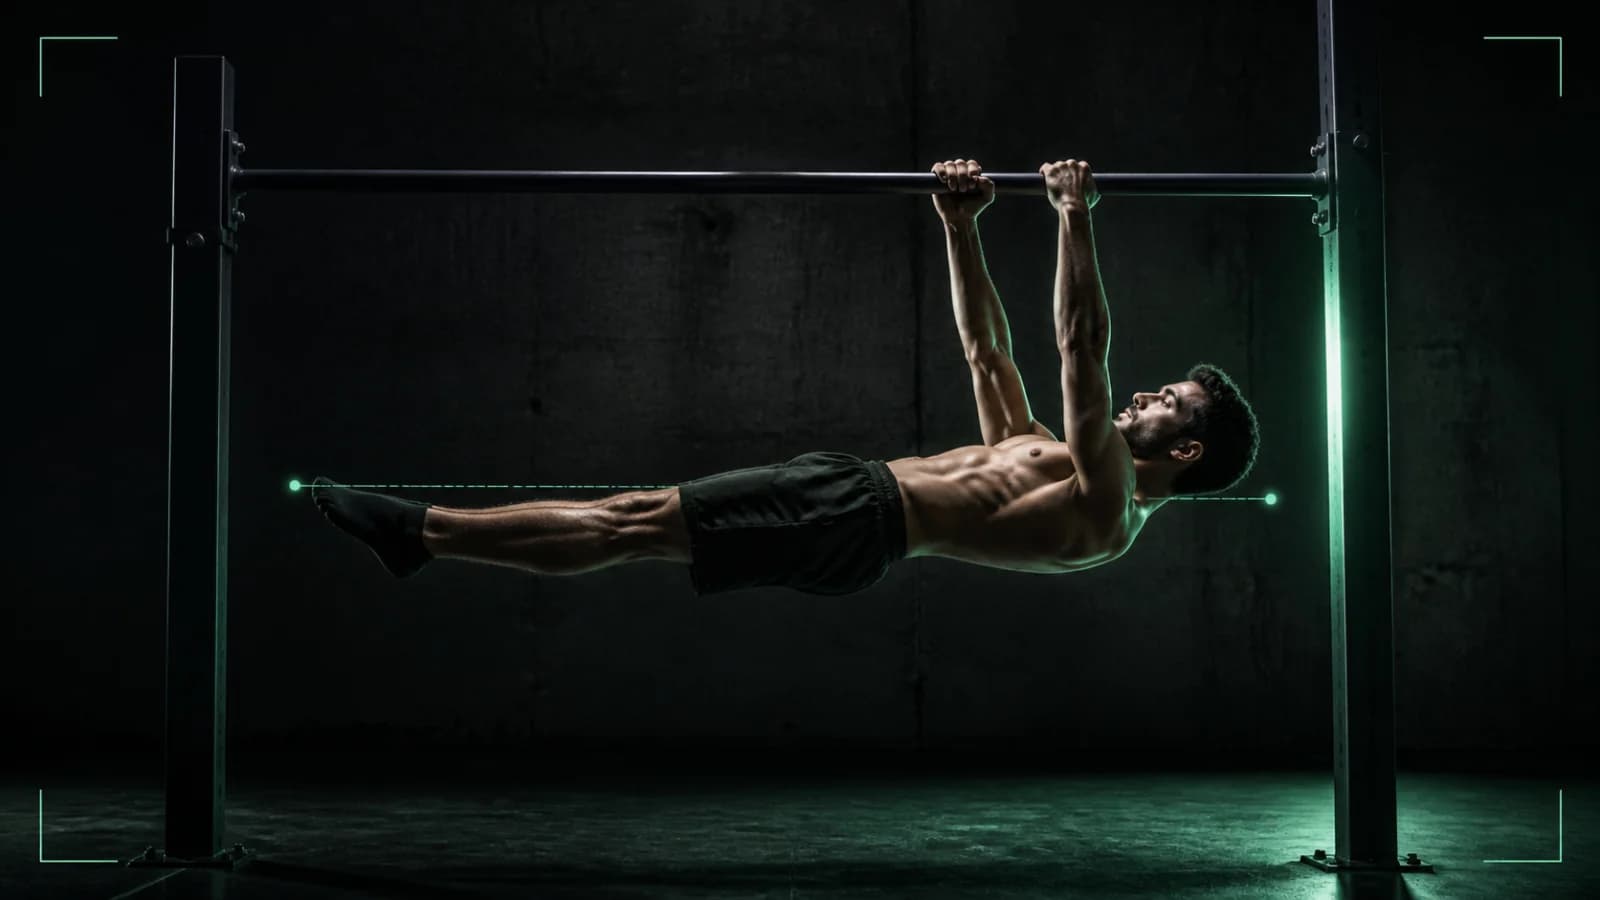
Choose the easiest front lever variation in which you can keep straight elbows, a controlled shoulder position, and a stable line from shoulders through hips. Film that variation from the side. Move to a harder shape only after you can reproduce those visible checkpoints across comparable attempts—not because you reached an arbitrary hold time once.
Use a progression that preserves your line
A practical sequence is tuck → open tuck → one-leg or straddle → full front lever. Treat it as a menu, not a law. Your limb lengths, current pulling strength, equipment, and training history affect which intermediate shape gives you the smallest useful increase in difficulty.
| Variation | What changes | What must stay visible |
|---|---|---|
| Tuck | Both knees stay close to the torso | Straight elbows, controlled shoulders, hips near shoulder height |
| Open or advanced tuck | Hips open and knees move farther from the chest | The torso does not sag as the lever lengthens |
| One-leg | One leg extends while the other stays tucked | Hips remain square and the extended leg follows the torso line |
| Straddle | Both legs extend with a wider base | Knees stay extended and both sides remain level |
| Full front lever | Legs join and the lever reaches its longest common shape | Shoulders, hips, knees, and feet hold one controlled line |
You do not need to use every step. If a one-leg position twists your pelvis but a straddle stays level, train the straddle. If both shapes break immediately, shorten the lever again. The right progression is the one that lets you practise the target position without hiding the first technical loss.
Check five things on video
Record from a true side view and review the same points in the same order:
- Elbows: They stay straight rather than bending as you fight the hold.
- Shoulders: You maintain an active, controlled position instead of hanging loosely or shrugging toward your ears.
- Hip height: Your hips stay close to the line between your shoulders and feet rather than dropping first.
- Body shape: Your ribs, pelvis, knees, and feet move as one chosen shape without a sudden arch or twist.
- Entry and exit: You reach and leave the position under control instead of using a swing that hides where you lose it.
Video can show these positions, but it cannot diagnose why one of them changed. Write “hips dropped after the legs extended,” not “my lats are weak.” The first statement describes evidence. The second claims a cause that one camera angle cannot prove.
Film a clip you can compare
Place your phone far enough away to show the bar, hands, shoulders, hips, knees, and feet throughout the attempt. Set it near hip height and perpendicular to your body. Lock the phone in place, avoid digital zoom, and keep the same orientation for every clip.
Film two or three attempts of the same variation while you still feel fresh. Include the setup and the exit. A clip that starts after you reach the position cannot show whether a jump, kick, or swing changed the result. Keep the training lane clear and put the phone where neither you nor another athlete can land on it.
Use the filming guide to set a repeatable angle. If you also want to compare the pulling phase that supports your lever work, the pull-up form check shows how to review a strict repetition without mixing camera positions.
Decide whether to repeat, regress, or progress
Watch each attempt once at normal speed, then move through the cleanest clip frame by frame. Pause when your body reaches its most level position. Record one observable result for each checkpoint.
- Repeat the variation when the line is present but not yet consistent across comparable attempts.
- Regress the variation when elbow bend, hip drop, twisting, or an uncontrolled entry appears as soon as you lengthen the lever.
- Progress one variable when you reproduce the same position and control. Open the tuck slightly, extend one leg farther, narrow the straddle a little, or add a clean attempt—but do not change all four at once.
This method replaces a universal hold-time gate with evidence you can actually compare. A longer hold with a lower hip position is not automatically better. A short, controlled exposure to the intended line may give you a clearer training target.
Build a simple front lever session
Place front lever practice near the beginning of a strength session, after a general warm-up and movement-specific preparation. Use a variation you can control, stop the set before fatigue changes the shape, and allow enough rest to make the next attempt comparable. Bodyweight resistance can support strength development, but the American College of Sports Medicine stresses that consistent training and an individualised programme matter more than a needlessly complex plan.
A focused session can use three blocks:
- Position practice: Perform several clean attempts at your current front lever variation.
- Related pulling work: Choose a row, pull-up, or controlled eccentric that you can perform with repeatable form.
- Review: Save the clearest side-view clip, write one visible observation, and choose one change for the next session.
Do not add difficulty simply because the session felt easy. Compare the clip with your previous recording first. Keep equipment, camera angle, variation name, and cue in your log so you know which condition changed.
Use a three-session comparison
In session one, create a reference clip in the easiest useful variation. In session two, repeat the camera setup and test one cue, such as keeping the hips level as you open the tuck. In session three, keep that checkpoint and make the smallest practical increase in lever length.
Name each saved clip with the variation and date. “Open tuck—hips level” tells you more than “front lever best.” Keep unsuccessful attempts when they answer a useful question; they show exactly where the shape changed. Delete clips that crop the feet, hide the bar, or move during the hold because they cannot support a fair comparison.
Common progression mistakes
Chasing the full shape too early. If you extend both legs and immediately lose the shoulder-to-hip line, return to a shorter lever and open it gradually.
Comparing different views. A front-oblique clip can make one hip look higher. Use the side view for body-line changes and a separate front view only when you need to check rotation.
Treating one hold as proof. A single good frame may come from momentum. Compare the entry, stable portion, and exit across more than one attempt.
Training every attempt to failure. When fatigue changes the position, you stop comparing the skill you intended to practise. End the set while the checkpoint remains observable.
Assigning a cause from one clip. A dropped hip does not tell you which training change will help. Test one change, film again, and ask a qualified coach when the explanation remains unclear.
Safety and next step
Use a secure bar and clear enough space beneath it before each attempt. Stop if you feel sharp or increasing pain. A recording cannot assess an injury or replace individual guidance from a qualified coach or clinician.
Your next step is simple: choose one repeatable variation, film two side-view attempts, and write one body-line observation. Use the training tool to plan the next comparison, then return to the same checkpoint instead of starting a new test every session.